How to Capture Data
It is highly recommended to capture the video and images in advance, as this will make the data upload process much smoother.
01

How to Capture the Walking Video
How to Capture the Walking Video
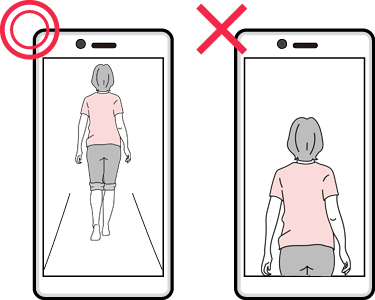
2. Walk 6–10 steps one way, and repeat this twice.
3. Walk at your normal pace and manner.
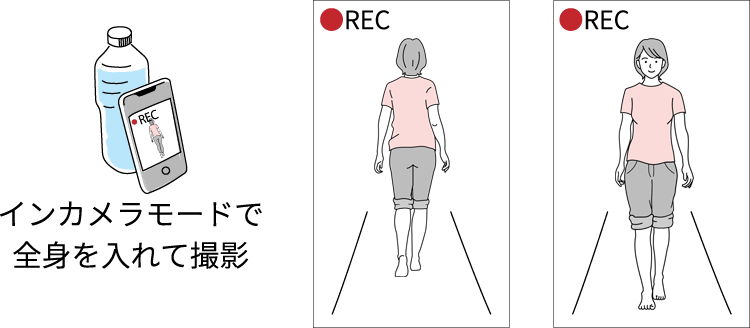
Important Notes for Video Capture
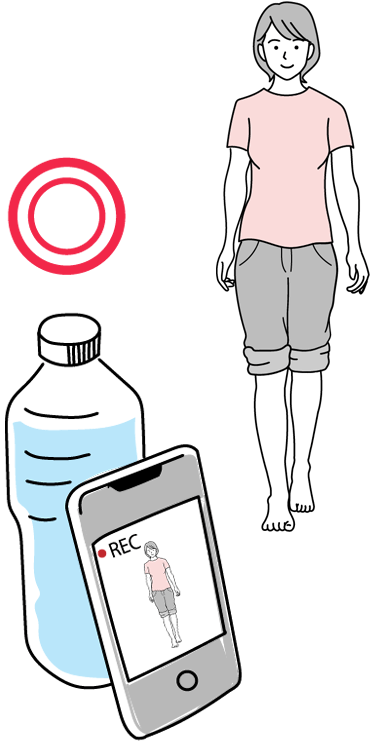
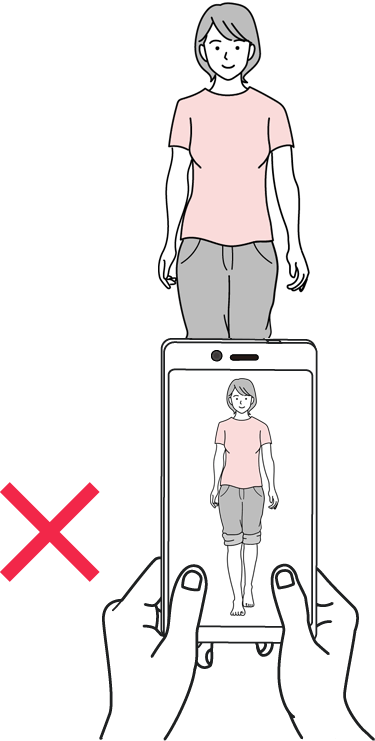
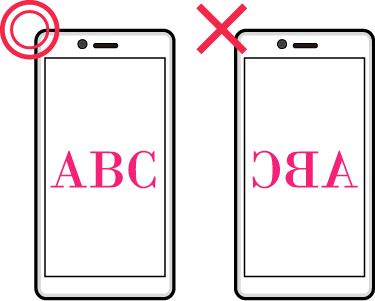
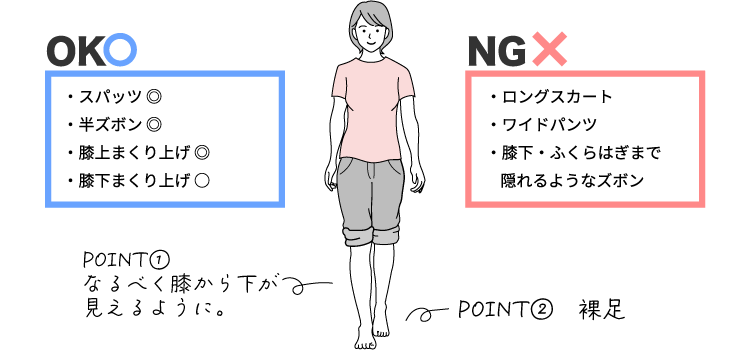
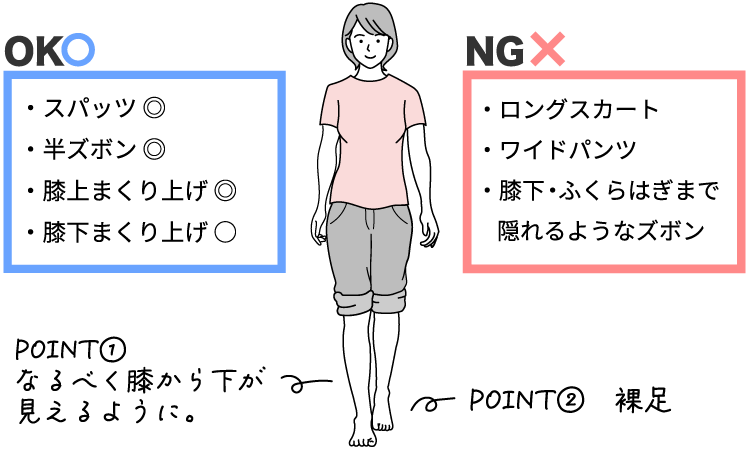
Clothing Guidelines
02

How to Capture the Single-Leg Stand Video
How to Capture the Single-Leg Stand Video
2. Raise your thigh high and hold for 2-3 seconds.
3. Alternate legs for two sets.
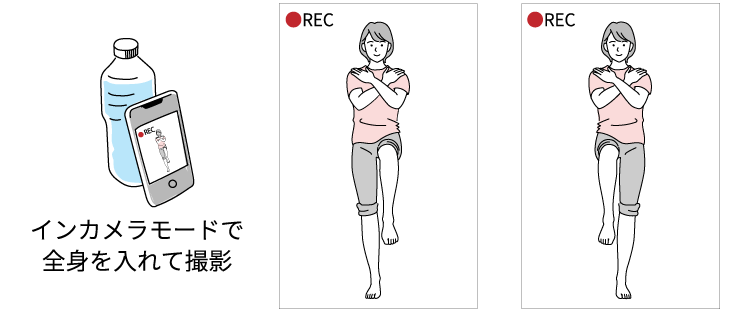
Important Notes for Video Capture
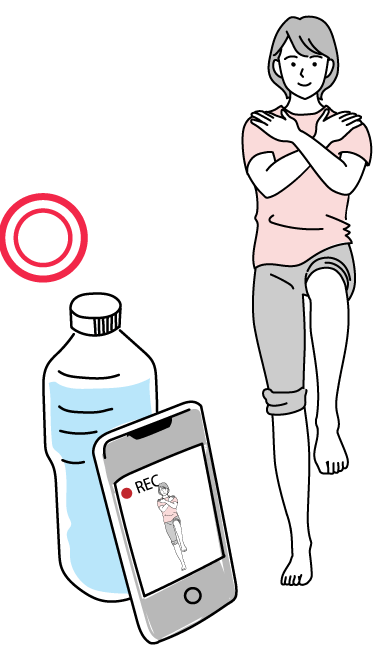
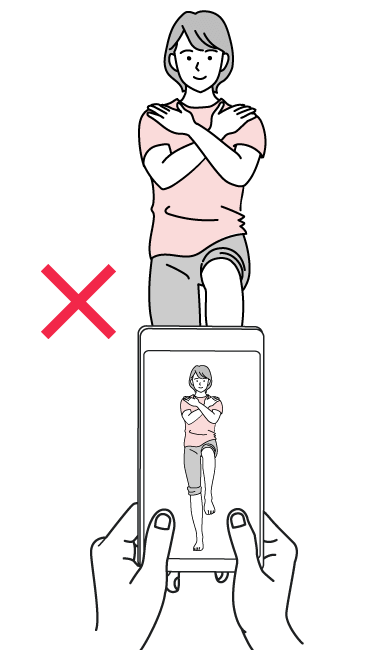

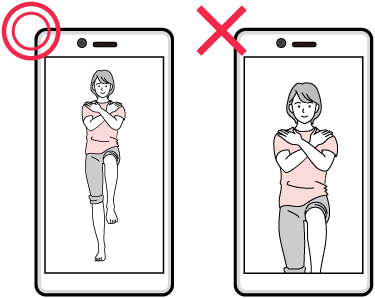
Clothing Guidelines


03

How to Capture Foot Images
How to Capture Foot Images
Capture one image from above as shown in the diagram below.

Place your heel against a wall.

Keep your toes straight.

Include both the wall and floor in the frame.

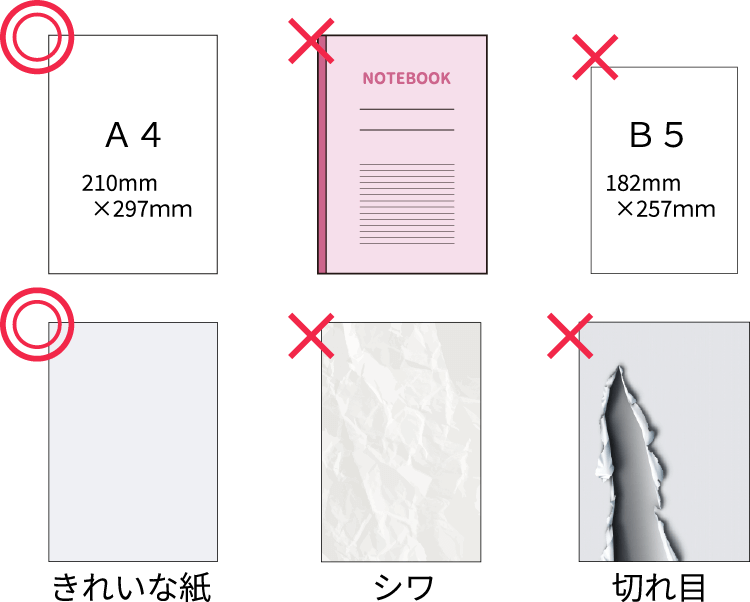
Use a clean A4 sheet.
04

How to Capture the Shoe Images
How to Capture the Shoe Images
Capture one image from above, as shown in the diagram below:

Place your heel against a wall.

Keep your toes straight.

Include both the wall and floor in the frame.

Use a clean A4 sheet.

Data
UP
Uploading the Data
Uploading the Data
After capturing the videos and images, please upload them using the link provided in the payment confirmation page and the confirmation email sent after completing the payment.
How to Capture Data
It is highly recommended to capture the video and images in advance, as this will make the data upload process much smoother.
01

How to Capture the Walking Video
How to Capture the Walking Video
2. Walk 6–10 steps one way, and repeat this twice.
3. Walk at your normal pace and manner.

Important Notes for Video Capture


Clothing Guidelines


02

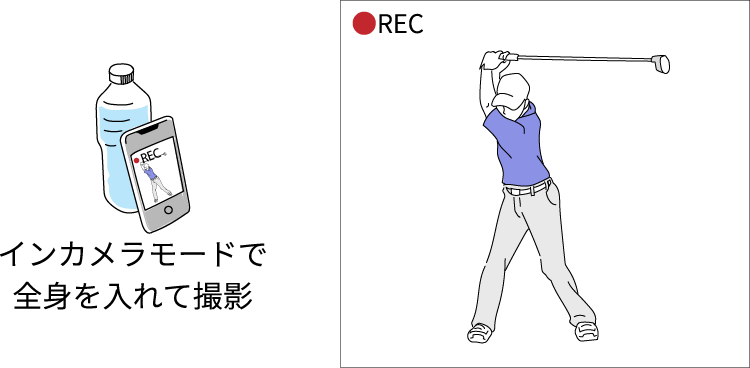
How to Capture the Golf Swing Video
How to Capture the Golf Swing Video
2. The video should be no longer than 1 minute (no editing required).
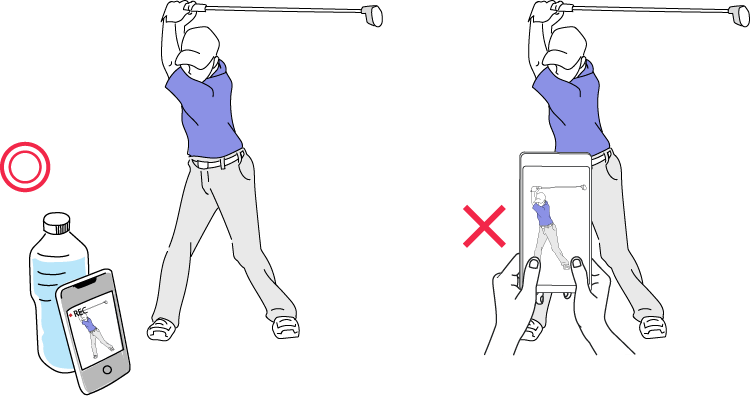
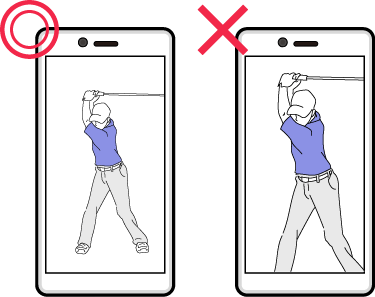
Important Notes for Video Capture

03

How to Capture Foot Images
How to Capture Foot Images
Capture one image from above as shown in the diagram below.

Place your heel against a wall.

Keep your toes straight.

Include both the wall and floor in the frame.

Use a clean A4 sheet.

04

How to Capture the Shoe Images
How to Capture the Shoe Images
Capture one image from above, as shown in the diagram below:

Place your heel against a wall.

Keep your toes straight.

Include both the wall and floor in the frame.

Use a clean A4 sheet.

Data
UP
Uploading the Data
Uploading the Data
After capturing the videos and images, please upload them using the link provided in the payment confirmation page and the confirmation email sent after completing the payment.
How to Capture Data
It is highly recommended to capture the video and images in advance, as this will make the data upload process much smoother.
01

How to Capture the Walking Video
How to Capture the Walking Video
2. Walk 6–10 steps one way, and repeat this twice.
3. Walk at your normal pace and manner.

Important Notes for Video Capture


Clothing Guidelines


02

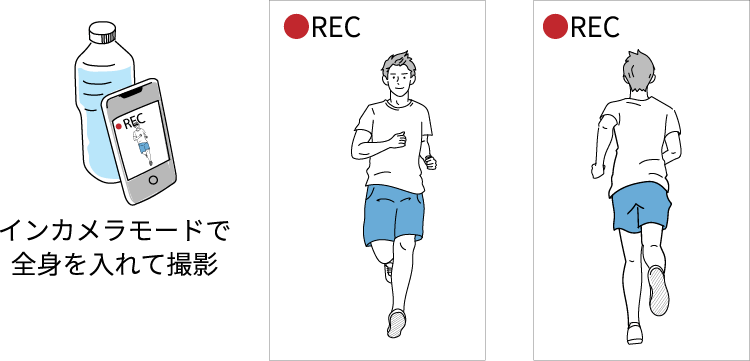
How to Capture the Running Video
How to Capture the Running Video
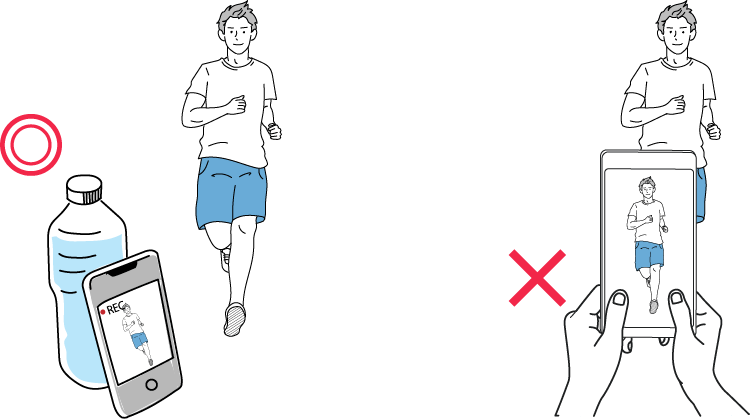
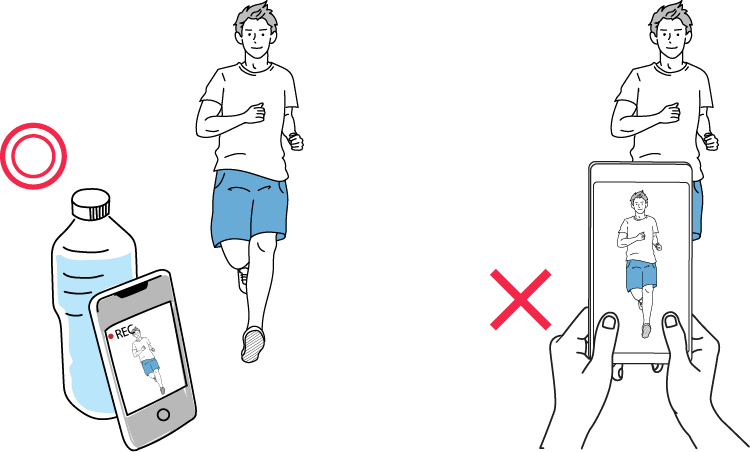
2. Run 10–15 meters for two consecutive trips.
3. Run at your usual speed.
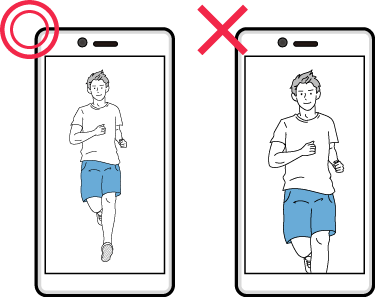
Important Notes for Video Capture

03

How to Capture Foot Images
How to Capture Foot Images
Capture one image from above as shown in the diagram below.

Place your heel against a wall.

Keep your toes straight.

Include both the wall and floor in the frame.

Use a clean A4 sheet.

04

How to Capture the Shoe Images
How to Capture the Shoe Images
Capture one image from above, as shown in the diagram below:

Place your heel against a wall.

Keep your toes straight.

Include both the wall and floor in the frame.

Use a clean A4 sheet.

Data
UP
Uploading the Data
Uploading the Data
After capturing the videos and images, please upload them using the link provided in the payment confirmation page and the confirmation email sent after completing the payment.
データの撮影方法
It is highly recommended to capture the video and images in advance, as this will make the data upload process much smoother.
01

How to Capture the Walking Video
How to Capture the Walking Video
2. Walk 6–10 steps one way, and repeat this twice.
3. Walk at your normal pace and manner.

Important Notes for Video Capture


Clothing Guidelines


02

How to Capture the Side Jump Video
How to Capture the Side Jump Video
2. Jump to the opposite side about 1.5 meters, and hold the landing for 2 seconds.
3. Repeat the jumps for three sets.
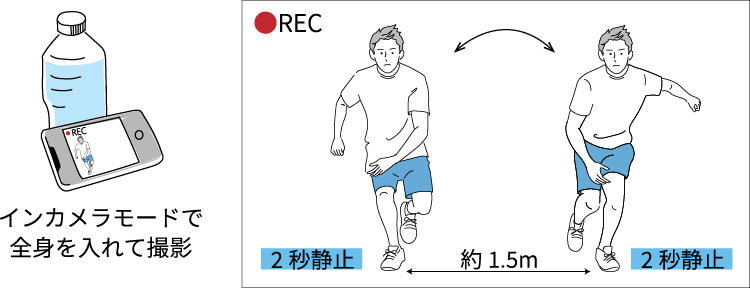
Note: It's okay to lose balance during this test as we are analyzing natural balance.
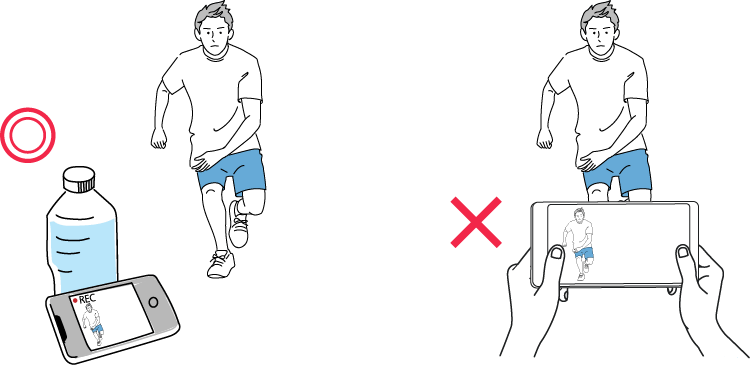
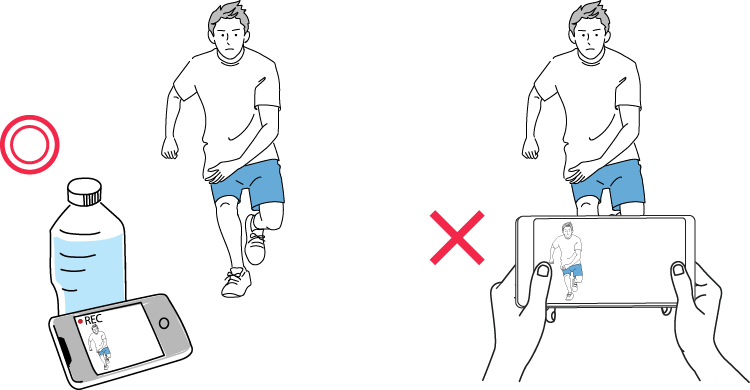
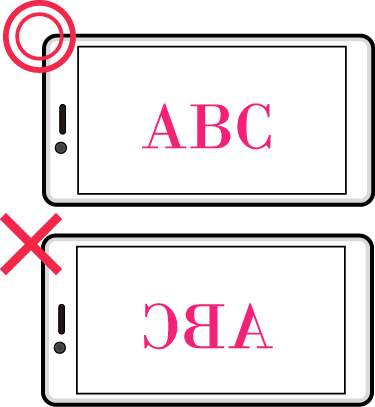
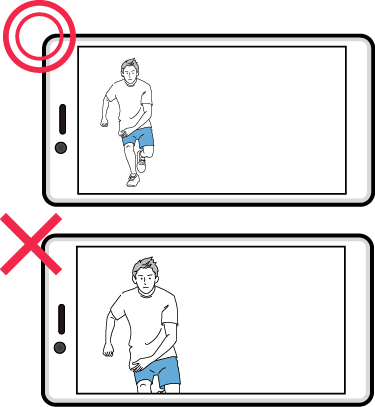
Important Notes for Video Capture
03

How to Capture Foot Images
How to Capture Foot Images
Capture one image from above as shown in the diagram below.

Place your heel against a wall.

Keep your toes straight.

Include both the wall and floor in the frame.

Use a clean A4 sheet.

04

How to Capture the Shoe Images
How to Capture the Shoe Images
Capture one image from above, as shown in the diagram below:

Place your heel against a wall.

Keep your toes straight.

Include both the wall and floor in the frame.

Use a clean A4 sheet.

Data
UP
Uploading the Data
Uploading the Data
After capturing the videos and images, please upload them using the link provided in the payment confirmation page and the confirmation email sent after completing the payment.
How to Capture Data
It is highly recommended to capture the video and images in advance, as this will make the data upload process much smoother.
01

How to Capture the Walking Video
How to Capture the Walking Video
2. Walk 6–10 steps one way, and repeat this twice.
3. Walk at your normal pace and manner.

Important Notes for Video Capture


Clothing Guidelines


02

How to Capture the Single-Leg Stand Video
How to Capture the Single-Leg Stand Video
2. Raise your thigh high and hold for 2-3 seconds.
3. Alternate legs for two sets.

Important Notes for Video Capture


Clothing Guidelines


03

How to Capture Foot Images
How to Capture Foot Images
Capture one image from above as shown in the diagram below.

Place your heel against a wall.

Keep your toes straight.

Include both the wall and floor in the frame.

Use a clean A4 sheet.

Data
UP
Uploading the Data
Uploading the Data
After capturing the videos and images, please upload them using the link provided in the payment confirmation page and the confirmation email sent after completing the payment.